How to draw electrical cables
Cables group individual wires into logical units. The program lets you draw cable symbols, name them, enter their type and length, label the individual cores and then generate a clear list of cables from all of it.
How to draw a cable symbol
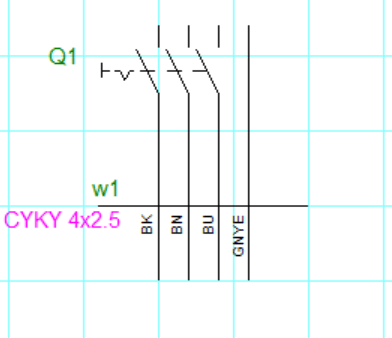
Choose Insert - Cable or press K. Then use the mouse to cross the wires that make up the cable.

Cable settings
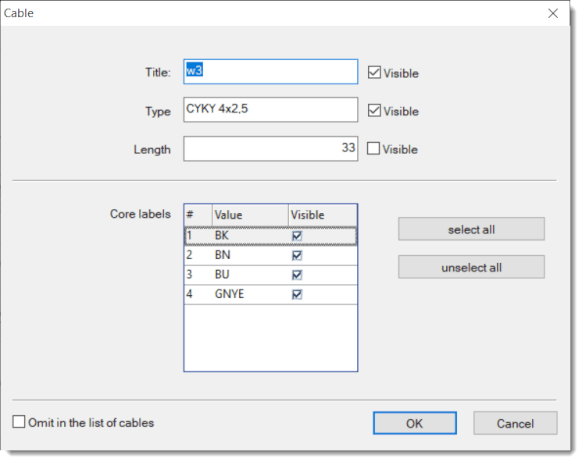
After drawing, a dialog opens where you enter the cable's name, type and estimated length. In the lower part of the dialog is the Core labels area — for each core you can enter a label and choose whether it is visible in the drawing. These labels appear directly in the drawing and in the List of cables report.
Press Esc to finish drawing cables.
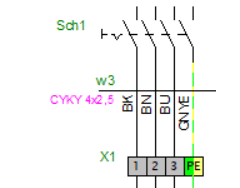
Rotating core labels
You can rotate the labels of the cable cores with the toolbar buttons. This helps when the labels collide with other elements in the drawing.
Cable Manager and List of Cables
The Cable Manager (menu Outputs - Cable manager) gives you an overview of all cables in the drawing and lets you edit their properties — change the name, type and length directly in the table.
The List of Cables (menu Outputs - List of cables) prints a list of all cables. Check Group to show the total cable lengths by type.
How to change the name, type or length of a cable
You have two options:
- Right-click the cable symbol and choose
Properties— a dialog for editing the data opens. - Change the values directly in the table of the
Cable manager.
Cables with multiple symbols
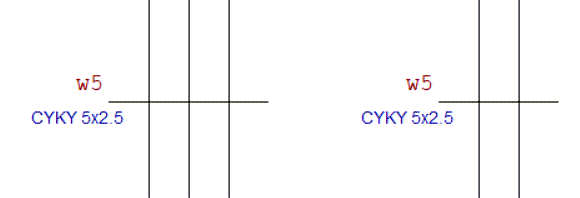
A single cable can have several symbols with the same name. This is useful in two cases: when the cable continues on another page, or when you want each symbol to carry only some of the cable's cores.
How to rename a cable
a) In the Properties panel — all symbols of that cable are renamed at once.
b) Right-click the symbol and choose Properties — only that particular symbol is renamed.
