Terminals
A terminal is a symbol whose function is set to terminal in the symbol editor. A terminal strip can be drawn in two ways:
- terminal block – one symbol contains several terminals (for example 4 or 12),
- single terminals – each symbol is one terminal; the strip is spread over the drawing, possibly over several pages.
Both ways can be combined in one strip.
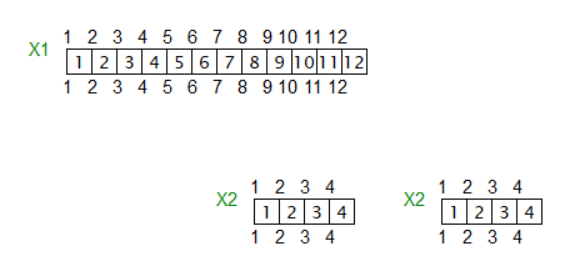
Terminal Designation
The full designation of a terminal, for example X1:5, has two parts:
- the reference of the symbol designates the terminal strip (
X1), - the terminal number (
5) is stored in the attribute of the connection point.
The program joins both parts itself – in the list of terminals, in the Explorer and when searching. Therefore enter only the strip designation into the reference of the symbol.
⚠️ A colon in the reference is an error. If you enter X1:6 into the reference, the program treats the whole text as the strip designation. Consequences:
- the list of terminals shows the designation
X1:6:6, - the Renumber terminals dialog splits the strip into several rows (
X1,X1:6, …), - searching for
X1:6does not find the terminal.
Correct procedure: enter X1 into the reference and assign the terminal number with the Renumber terminals dialog (see below), or enter it directly in the attributes of the connection points.
Terminal Strips in the Library
The library includes a good selection of terminal strips. Use the symbol search function and search for "terminal" or "terminal strip".
If you need a custom terminal strip, follow the instructions below.
Draw Your Own Terminal Strip
- Draw the terminal strip in the symbol editor.
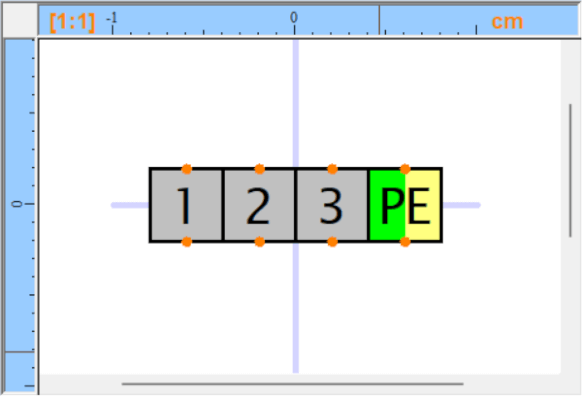
- Add two connection points for each conductive connection (using the
 icon), one as input, one as output. This means the terminal block must have an even number of connection points.
 - ⚠️ Make sure the connection points are added one after another (verify this in the Explorer panel).
- Mark the symbol as a terminal: press
F12, go to theSymboltab, and underFunctionselectTerminal. - Save the symbol (
Ctrl+S) and close the symbol editor (Ctrl+W). - Insert the terminal block into your drawing, right-click it, and select
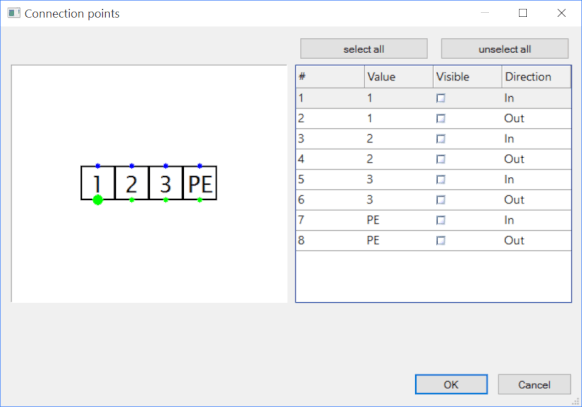
Setup connection points. - Each pair of conductively connected connection points must share the same name. One must be marked as input (IN), the other as output (OUT). Double-click to toggle between IN and OUT. Example of a terminal strip with four terminals:
- Right-click the terminal strip and select
Save positions of labels. This saves the configuration to the library so you won't need to repeat the setup when you reuse the symbol.
Terminal Numbering
Terminal numbers are stored in the attributes of the connection points. In a terminal block, each terminal has two connection points with the same number – the program assumes that connection points with the same number are conductively connected.
The number of the first terminal of a block is set in the Properties panel, group Others, field Start number. The other terminals of the block follow: a block with four terminals and start number 5 gets the numbers 5 to 8. For a single terminal, the start number is directly its number. If you don't see this field, the symbol hasn't been marked as a terminal.
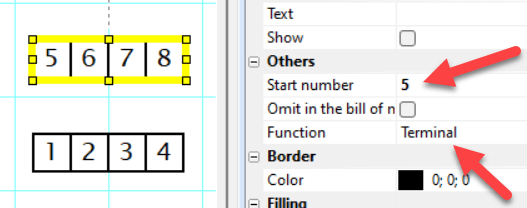
Manual setting is fine for one block. For a strip made of several blocks or of single terminals, the Renumber terminals dialog is faster.
Renumbering Terminals
The command Edit → Renumber terminals opens a dialog with all terminal strips of the project. Each row is one terminal strip (reference). The Terminals column shows the terminal numbers in the order in which the terminals get them.
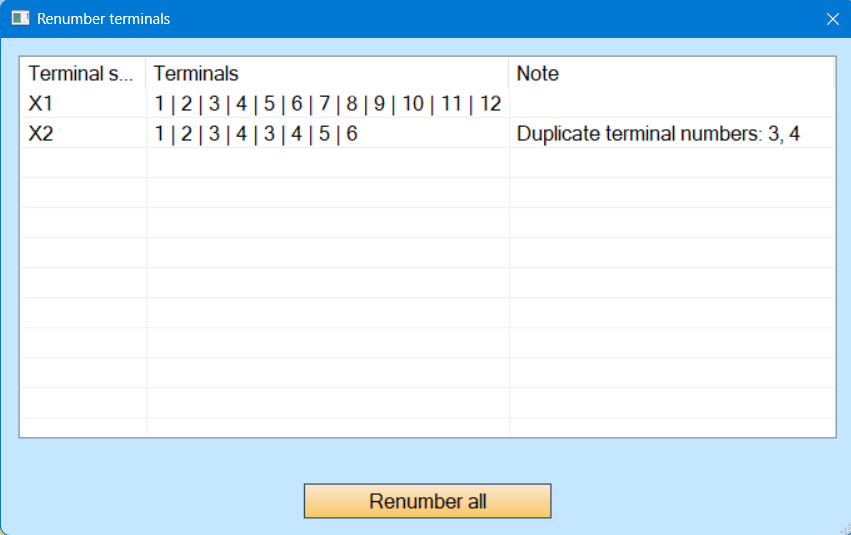
The Renumber all button numbers every strip from 1. Inside a strip, the terminals are numbered in this order:
- by page,
- from top to bottom,
- from left to right.
A terminal block continues where the previous one ended: strip X1 made of three blocks with four terminals each gets the numbers 1–4, 5–8 and 9–12.
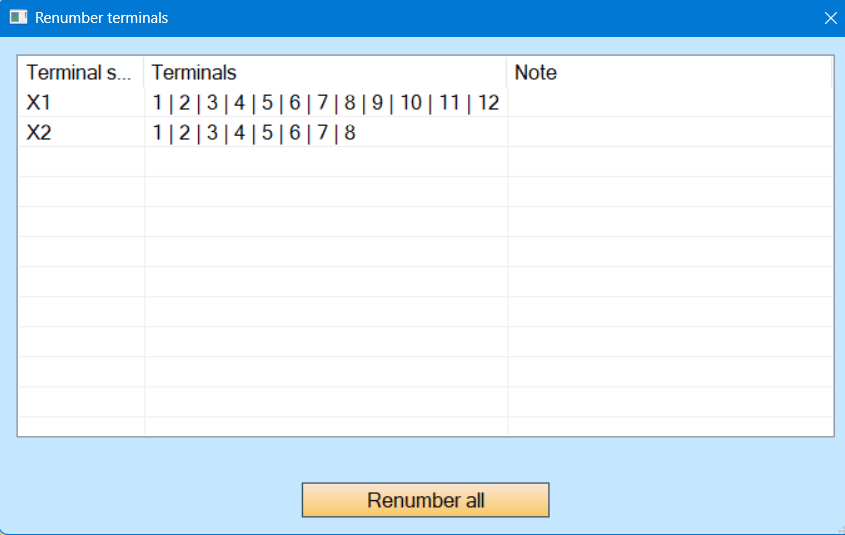
To renumber only some strips – for example a newly added X3 while X1 and X2 are already wired – select their rows. The button changes to Renumber selected and the other strips stay unchanged. Select several rows with Ctrl or Shift.
Renumbering is a single action – undo it with Ctrl + Z.
ℹ️ In versions 12 and 13 the numbering continued across all terminal strips (X1 = 1–8, X2 = 9–12). Since version 14 every strip starts from 1. If you need continuous numbering, set the start number of the blocks manually.
The Note Column
The Note column of the dialog warns about these situations:
- colon in the reference – see Terminal Designation above,
- duplicate terminal numbers – two terminals of the same strip have the same number, for example after copying a block; renumbering fixes it,
- symbol without numeric attributes – the symbol has the terminal function, but its connection points have no numeric attributes. Renumbering skips such a symbol; fix the attributes as described in Draw Your Own Terminal Strip above.
Terminals in the Explorer and Search
The Explorer panel shows the numbers of a terminal, for example terminal: X1, R: 1,2,3,4. You can search for a terminal by its full designation, for example X1:5.
List of Terminals
To find out which wires, cables and devices are attached to the terminals, use the List of terminals report.
