List of Terminals
The List of Terminals (Outputs - List of Terminals) shows every terminal in your drawing. For each terminal, you'll see:
- wire name
- cable name
- attached symbol and connection point name
- grid zone of the symbol
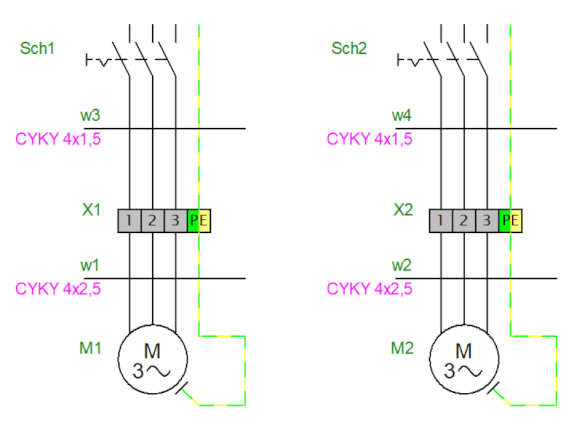
Example
For this connection:
The program generates this terminal list:
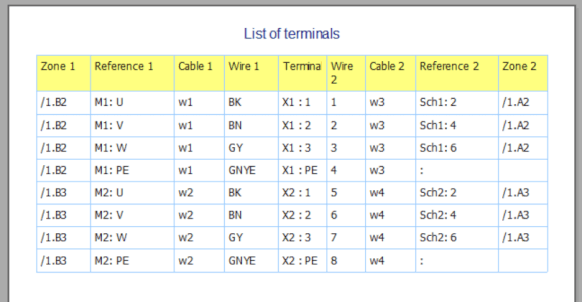
Terminal input appears on the left, output on the right.
Terminal Strips in the Library
The library includes a good selection of terminal strips. Use the symbol search function and search for "terminal" or "terminal strip".
If you need a custom terminal strip, follow the instructions below.
Draw Your Own Terminal Strip
-
Draw the terminal strip in the symbol editor.

- Add two connection points for each conductive connection (using the
 symbol) -- one as input, one as output. This means the terminal block must have an even number of connection points.
 - Make sure the connection points are added one after another (verify this in the Explorer panel).
- Mark the symbol as a terminal: press
F12, go to theSymboltab, and underFunctionselectTerminal. - Save the symbol (
Ctrl+S) and close the symbol editor (Ctrl+W). -
Insert the terminal block into your drawing, right-click it, and select
Setup connection points. - Each pair of conductively connected connection points must share the same name. One must be marked as input (IN), the other as output (OUT). Double-click to toggle between IN and OUT.
Example of a terminal strip with four terminals: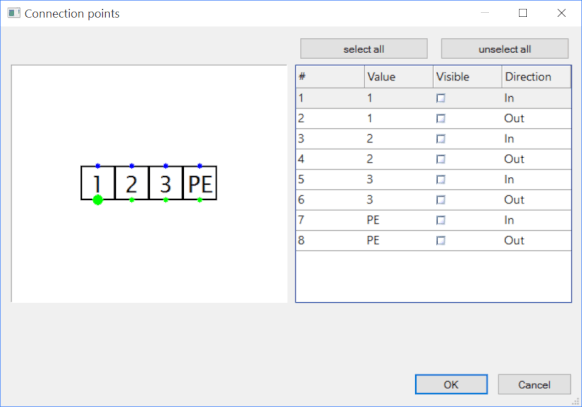
- Right-click the terminal strip and select
Save positions of labels. This saves the configuration to the library so you won't need to repeat the setup when you reuse the symbol. -
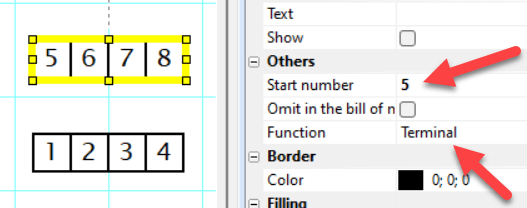
If the symbol contains a text with a number, you can change it in the drawing. In the
Propertiespanel, under theOthergroup, enter the number in theStart numberfield. If you don't see this field, the terminal strip hasn't been marked as a terminal.